Recipes
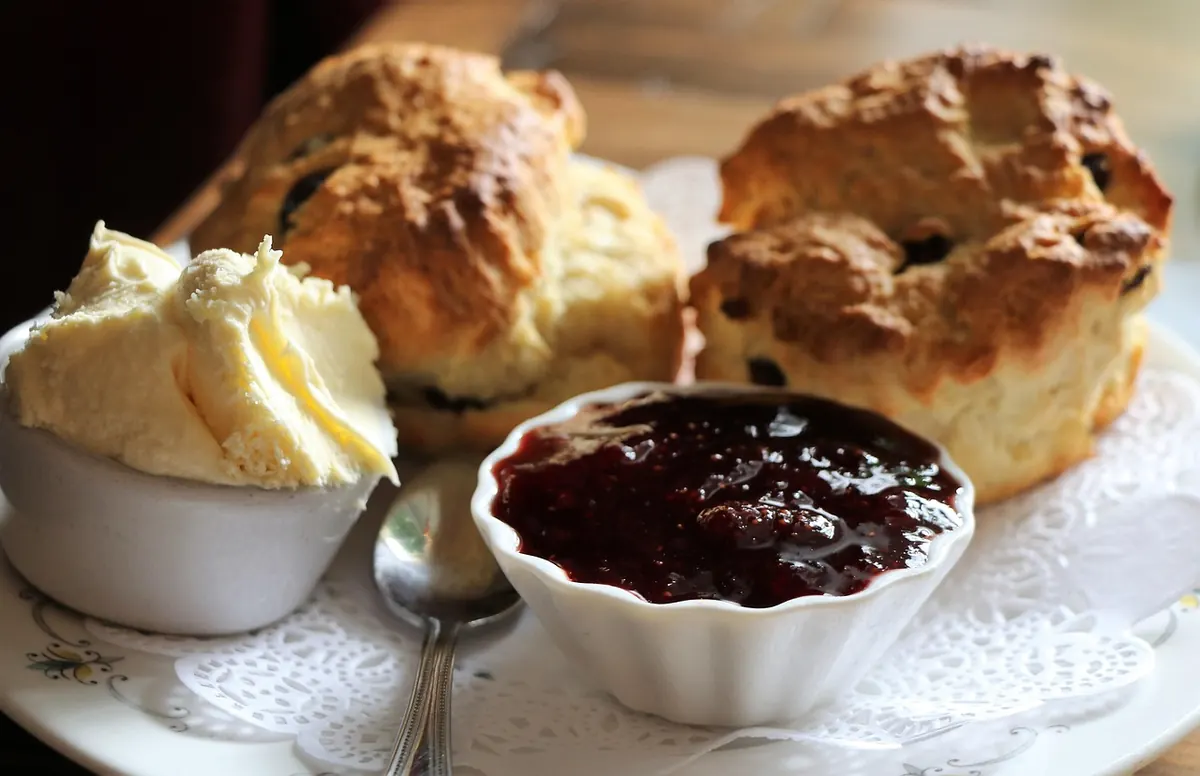
Traditional British Scones with Clotted Cream and Jam
There is a particular pleasure in a proper British scone: pale gold on top, split open while still warm, thick with clotted cream and jam. It is not a complicated bake — flour, butter, milk, a little sugar — but it is an unforgiving one. Almost everything that makes a scone good happens in the four minutes between adding the milk and cutting the rounds, so the details matter far more than the ingredient list.
This is the version to keep in your head for afternoon tea: plain, lightly sweet, and built to climb rather than spread.
What Makes a British Scone Different
An American scone is often a sweet, rich, crumbly wedge — heavy on butter, sometimes studded with nuts or fruit, closer in spirit to a pastry. A British scone is plainer and softer. It is barely sweet, because it is designed to be split and filled rather than eaten on its own. Milk does most of the liquid work, and the mixing is quick and light rather than thorough.
What you are aiming for is a scone that roughly doubles its height in the oven, with a flat, faintly cracked top, a soft and close crumb, and a clean horizontal break along the middle when you pull it apart. If your dough shapes into a neat, sharp-edged cylinder and holds a crisp rim, you have probably taken it too far.
The Ingredients
Weigh where you can. It is faster than spooning and levelling, and it makes the difference between a consistent scone and a lucky one.
- 350g self-raising flour, sifted — or plain flour with 2 extra teaspoons of baking powder
- 1 rounded teaspoon baking powder — a small insurance policy for the rise
- ¼ teaspoon fine salt
- 85g cold unsalted butter, cut into small cubes
- 3 tablespoons caster sugar — drop to 2 if you like them properly plain
- 175ml whole milk, plus a splash more for glazing
- A squeeze of lemon juice, stirred into the milk and left for five minutes to sour slightly
That soured milk is doing real work: the acid reacts with the baking powder and gives a noticeably better lift than plain milk. If you keep buttermilk in the fridge, use it straight instead. If you only have salted butter, halve the added salt. And if you want fruit scones, 75g of sultanas or raisins tossed in a spoonful of flour and stirred in with the sugar is about right — any more and the dough stops holding together.
How to Make Them, Step by Step
- Heat the oven to 220°C (425°F) and line a large baking tray with baking parchment.
- Squeeze the lemon juice into the milk and set it aside while you weigh everything else.
- Sift the flour, baking powder and salt into a large bowl. Add the cold butter and rub it in with your fingertips until the mixture looks like fine breadcrumbs, with no lumps bigger than a pea. Lift and crumble rather than pressing; warm hands make greasy dough.
- Stir in the sugar.
- Make a well in the middle, pour in most of the milk, and mix with a round-bladed knife using a cutting motion until a soft, slightly sticky dough forms. Add the last of the milk a splash at a time if it still looks dry. Do not knead.
- Tip onto a lightly floured surface and pat into a rough round about 3cm thick. Fold the dough in half once, then pat it out again to the same thickness. That single fold gives you a natural seam for splitting later.
- Cut with a 5–6cm fluted cutter, pressing straight down, then lift it out without twisting. Gather the scraps, pat them gently, and cut again. You should get 8 or 9 scones.
- Brush the tops with milk — or a beaten egg if you want a glossier, darker finish — and bake for 12 to 15 minutes, until risen and golden.
Cool them on a wire rack. If you like soft-sided scones, drape a clean tea towel over them while they cool.
The Rise: Five Details That Decide It
Do not twist the cutter. Pressing and rotating seals the cut edge, and a sealed edge cannot climb. Press down firmly and lift straight up. A sharp cutter matters more than a fluted one.
Keep everything cold. Cold butter creates steam as it melts in the oven, and that steam pushes the layers upward. If your kitchen is warm, chill the bowl and the flour for ten minutes first.
Work fast and lightly. The moment the dough is together, stop. Overworking develops gluten, and gluten makes scones tough and chewy rather than short and tender.
Get the thickness right. Roll or pat to about 3cm. Any thinner and there is not enough dough to rise; much thicker and the middle stays raw while the outside browns.
Use a genuinely hot oven. Scones need a burst of heat in the first few minutes. If your oven runs cool, give it an extra ten minutes of preheating and check the scones at 12 minutes rather than 15.
The Crumb: Keeping It Light
Crumb is decided in the mixing bowl, not the oven. Dry, crumbly scones usually mean too much flour on the work surface — dust lightly and use a bench scraper to lift the dough rather than flouring your way out of a sticky situation. Dense, bready scones almost always mean overworking.
If you have time, let the cut rounds sit on the tray for 15 minutes before baking. The flour hydrates more evenly through the dough, and the texture improves noticeably.
When it comes to splitting, pull the scone apart with your fingers or two forks rather than slicing it with a knife. The craggy, uneven surface holds cream and jam far better than a smooth cut plane.
Clotted Cream, Jam, and the Order of Things
Clotted cream is a thick, pale-yellow cream with a firm crust on top, made by slowly heating and cooling cream until it clots. It is rich — UK standards require at least 55% butterfat — and it is what makes an afternoon tea scone taste like an afternoon tea scone. If you cannot find it, beat a spoonful of mascarpone into softly whipped double cream for body, or simply use good double cream and accept the difference.
For jam, choose something firm-set: strawberry or raspberry, traditional and not too loose. Runny jam soaks straight into a warm scone. If yours is stiff from the fridge, warm a spoonful briefly and beat it to loosen.
Then there is the argument. In Devon, cream goes on first and jam on top. In Cornwall, jam goes first and cream sits on top of it in a thick dollop. Both are correct, depending on where you are standing. Cream first gives the jam a base to rest on; jam first keeps the cream from sliding off. Pick a side and defend it.
Make Ahead, Reheat, and Serve
Scones are at their best within a few hours of baking, and they are at their absolute best warm. Keep them wrapped in a tea towel on the day. After that, refresh them in a 160°C (325°F) oven for three or four minutes — a microwave will make them rubbery.
To get ahead, cut the raw scones, freeze them on a tray until solid, then bag them. Bake straight from frozen at 220°C (425°F), adding two or three minutes to the time. Baked scones also freeze well for about a month and can be refreshed from frozen in a moderate oven.
Serve with a pot of tea, a dish of clotted cream and a jar of jam, and let people help themselves. The whole point of a scone is that it is assembled at the table, not in the kitchen.
Photo: elsasupport / Pixabay